After Margaret mentioned that she was making these, we had many requests for instructions. These make a very thoughtful gift for anyone experiencing discomfort in the torso area.
Radiation Therapy Ice Bag Pillows
These pillows are designed with an envelope-with-flap style pillowcase which holds an ice pack (either in the same pocket as the pillow, or behind the flap for more security and an extra layer of protection.
For breast cancer patients, the pillow gives the patient a place to rest their arm, without making their arm too cold, while the cold pack helps relieve post-surgery swelling and pain, both at the breast site and the site where lymph nodes were removed. (Follow doctor’s instructions on this). Ice packs can also help relieve itching from radiation treatments.
These pillows are comforting to any patients undergoing radiation treatments; for neck and head radiation, for example. Fabrics that would be appealing to male patients are important to include in your pillowcase fabric selections.P
Pillows can be used without ice: as a place to rest the arm and protect sensitive areas, between the body and a seatbelt, or to “keep things from jiggling” after a lumpectomy. Post surgery needs, they can be used as a travel pillow, or as a heat pack for lower back. With ice, they are handy to combat hot flashes.
Materials: 12 x 20 muslin for pillow
12 x 28 cotton for pillow case top
12 x 28 cotton for pillow case lining
Pillow Stuffing: Pellon’s Perfect Loft Cluster fiberfill (doesn’t clump)
Optional – but recommended – flexible ice pack (can be
frozen or microwaved)
Pillow:
Fold muslin in half horizontally, sew together with ½” seam.
Leave opening to turn right side out. Stuff, then topstitch opening closed
Pillow Case:
Sew pillow case top and lining right sides together with ¼” seam
Leave opening for turning.
Turn pillow case right side out, press, topstitch turning opening shut
Fold up bottom of the pillow case, right sides together, about 1/3 of the length
(about 8 inches). Sew up both sides using ¼” seam (Miller variation: fold
pillow case wrong sides together, topstitch at very edge)
Finishing: turn right side out, insert pillow, folding over the flap inside pocket to hold the pillow in place. The flap is designed to be long enough to hold the pillow and ice pack securely, keeping ice pack separated from the pillow.
Notes: Perfect Loft Fiberfill: I use my Joanne’s coupons to get good store discounts
Other sources: Walmart.com . $4 per bag; pick up at store so no shipping
Fabric Depot (Portland) gives 40% discount if you buy groups of 6 bags
Ice Packs. Overstock.com “Accu-Therm ™ Reusable Cold & Hot
Compress” by Medline
Questions? Email Margaret at mjmqltr@gmail.com
April 2016 Off My Rocker
The Beat Goes On . . .
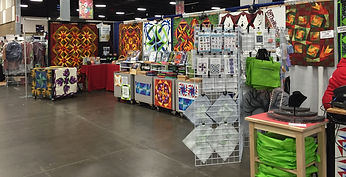
Ah, to be “Back in the Saddle Again” – demonstrating AnglePlay templates in the Off the Wall Quilting booth at the huge Sewing and Stitchery Expo in Puyallup, WA! What a joy to see so many friends and students from years past, and watch the sense of wonder on faces of quilters new to the piecing possibilities of AnglePlay!
What a difference from the very first quilt conference and vendor mall I attended “way back” in the late 1970’s – when I was a professor at California Polytechnic State University in San Luis Obispo, teaching “Creative Textiles” among other classes. One of my students introduced me to Ellyn Mosbarger, who had an appliqué pattern (and kit) business called Calico Mouse. We became fast friends, and she invited me to accompany her and her husband to Portland, OR, where she had a booth at an early West Coast Quilters Conference – one of the first of its kind in the embryonic quilting industry. I rode north with Dick and Ellyn in the front of their van chock full of patterns, kits, samples, and booth materials—seated on a bean bag between them! No seat belt laws then, either . . .
The differences between “then and now” are breathtaking; from slides in carousels (on sometimes poorly performing projectors) to animated power point presentations; from business cards to color multi-page brochures; from standard sewing machines to embroidery machines and longarm quilting machines that “go by themselves”. Booths were lit with flood lamps from hardware stores; now quilting treasures are lit with LED lights, and instructive videos about them run on continuous loops.
Then, there were no such thing as blogs and websites and ordering online. Quilting workshops were available only in classrooms, sponsored by guilds and shops; now, quilters find a multitude of online classes and a plethora of you tube videos to learn thousands of techniques. All guilds communicated by paper newsletters; interest groups for any topic happened in small neighborhood or guild special interest groups, not online.
The creation of acrylic templates and rotary cutting had not begun; Ginghers scissors were the coveted tool, and you didn’t need a special grooved holder for the hundreds of templates available now. The first set of acrylic geometric templates (only six of them: squares and half-square triangles in a couple sizes, with “Peaky and Spike”) by Doreen Speckmann, were still in the future.
Patterns for hundreds of tote bags and containers, clothing, gifts, embroidery motifs were a thing of the future too. So few books on quiltmaking were available, compared to what we have now. Quilting books had a longer shelf life then, too! In the seventies, Quilters Newsletter was in its infancy, and national organizations like National Quilters Association (NQA), American Quilters Society, American Quilt Study Group and The Applique Society were embryonic as well.
Gatherings for week-long workshops with a single teacher, like the Empty Spools Seminar at Asilomar in Monterey, began to take hold. I remember writing a check for $500 to take a color class from Michael James with such a sense of wonder; I had never spent that much on myself, and was thrilled that I needed to do so for “professional development”! That workshop was transformative for me as a developing quilter; we used Pantone colored papers and magazine pages as our material, not fabric. Travelling to study with “the greats” in those early years is how I learned quiltmaking; I absorbed not only basic as well as innovative techniques, but many teaching do’s and don’ts, too . . .
Little did I know that what I learned in those workshops, and the pure joy I felt there among quilters, would propel me all over the country and to international destinations to teach quiltmaking for 35 years. Thanks to the world of quiltmaking, I have stood at the tip of South Africa, looking out over the Cape of Good Hope, and I have seen the northern lights in the Northwest Territories—for this, I am so grateful.
So, what is your story?
Send your comments to julie@OffTheWallQuilt.com and we may include them in our newsletter. Everyone who sends a comment will be entered into a drawing for one of Margaret's books.